
Manual · Start here
Getting started
Install A9 Voice, set it up in five short steps, then dictate your first sentence and record your first meeting note.
Last updated for A9 Voice 0.7.8
A9 Voice is for Windows 10 and 11 (64-bit). Transcribe is free, always. Notes has a 30-day free trial that starts when you press Try Notes free (no signup, no card), then costs $49 once. It does two jobs. Transcribe types what you say into any app while you hold a key. Notes records a meeting, a video or a voice memo and turns it into a transcript and a summary. This page takes you from a fresh install to both.
Install#
- Download the installer from a9voice.com/download, open it, and follow the steps. Edge or Windows may show a note first, because A9 Voice is new and not code-signed yet; the download page explains each screen.
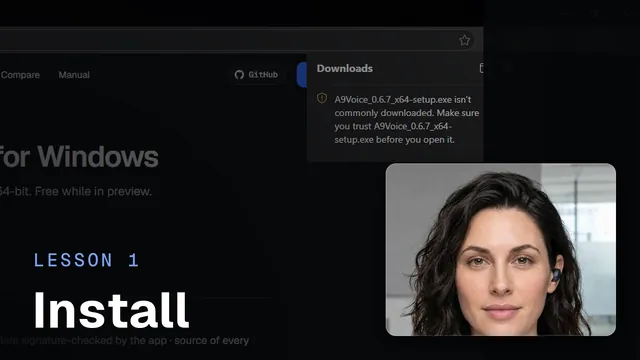 Installing A9 VoiceWatch the 1-minute video
 - A9 Voice installs for your Windows user only. It does not ask for administrator rights.
- If A9 Voice does not open by itself, open it from the A9 Voice folder in the Start menu.
A9 Voice starts with Windows and waits in the tray (the small icons by the clock). Closing its window does not quit it; the first time you close it, a notice says "A9 Voice is still running in the tray". To quit, right-click the tray icon and choose Quit.
Set up A9 Voice#
The first time you open A9 Voice, a setup screen walks you through five steps. A row of dots at the top shows where you are. You can click Back, Skip this step or Skip setup at any time, and you can finish later: if you close the window part-way, setup picks up where it stopped.
Step 1: your name#
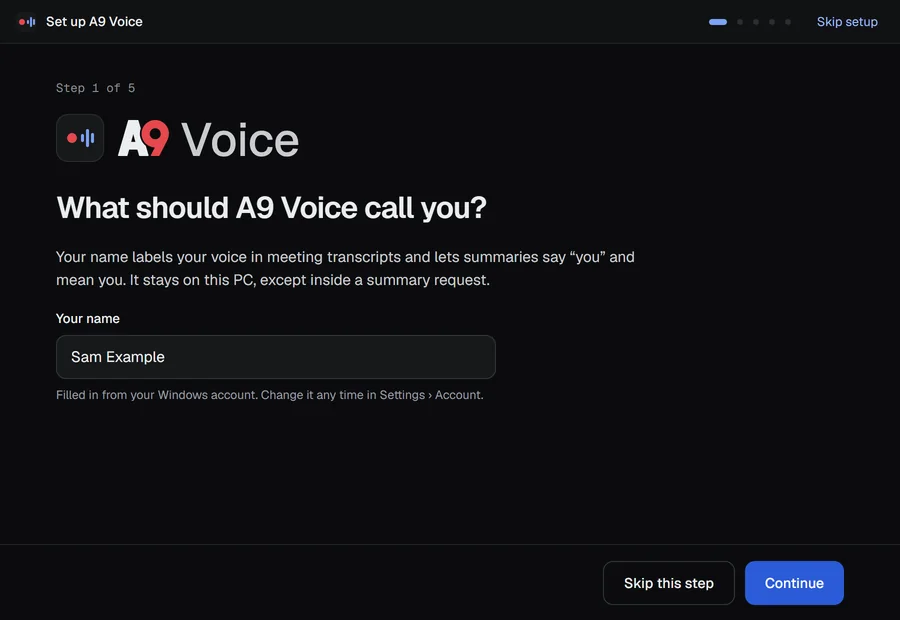
A9 Voice asks what to call you. It fills in your Windows name. Your name labels your voice in meeting transcripts and lets summaries say "you" and mean you. Change it any time in Settings › Account. Click Continue.
Step 2: your microphone#
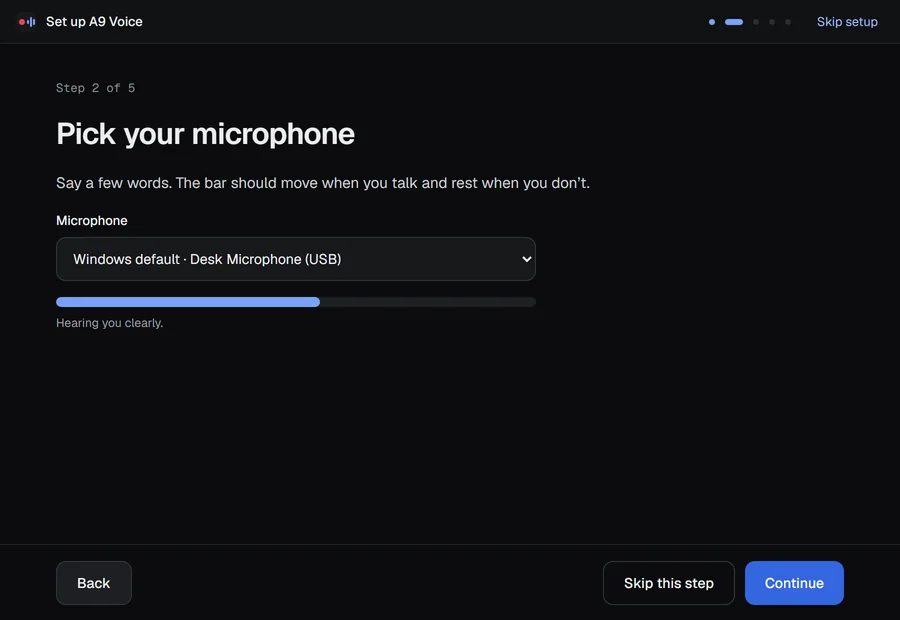
Pick your microphone, or leave Windows default. Say a few words: the bar moves when you talk and rests when you do not, and the text under it says Hearing you clearly. If nothing moves, check that the microphone is not muted. Click Continue.
Step 3: how A9 Voice hears you#
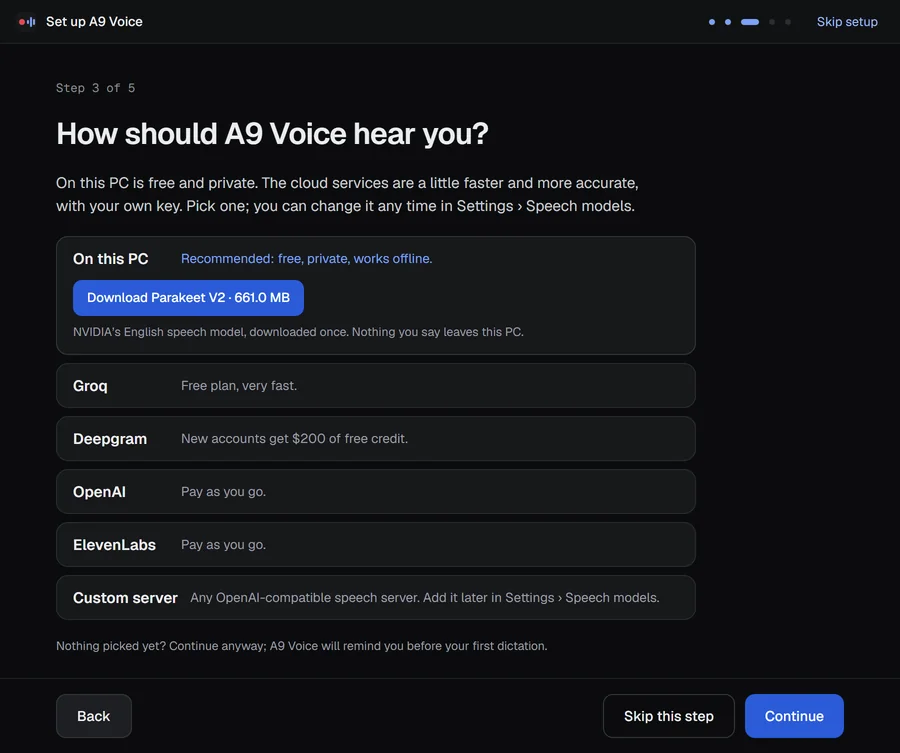
A9 Voice needs a speech service to turn your voice into text. Pick one; you can change it any time in Settings › Models (see Speech models).
- On this PC is marked Recommended: free, private, works offline. Click the tile, then Download Parakeet V2. It downloads once. Then A9 Voice checks its speed on your PC ("Checking its speed on this PC…") and the tile says Ready. After that, nothing you say leaves your PC. Parakeet V2 is an English model.
- Groq, Deepgram, OpenAI and ElevenLabs are cloud services. You bring your own key and pay the service directly. The setup screen notes that Groq has a free plan and that new Deepgram accounts get $200 of free credit.
- Custom server is for any OpenAI-compatible speech server. You add it later in Settings › Models.
To use a cloud service, click its tile and follow the three steps shown:
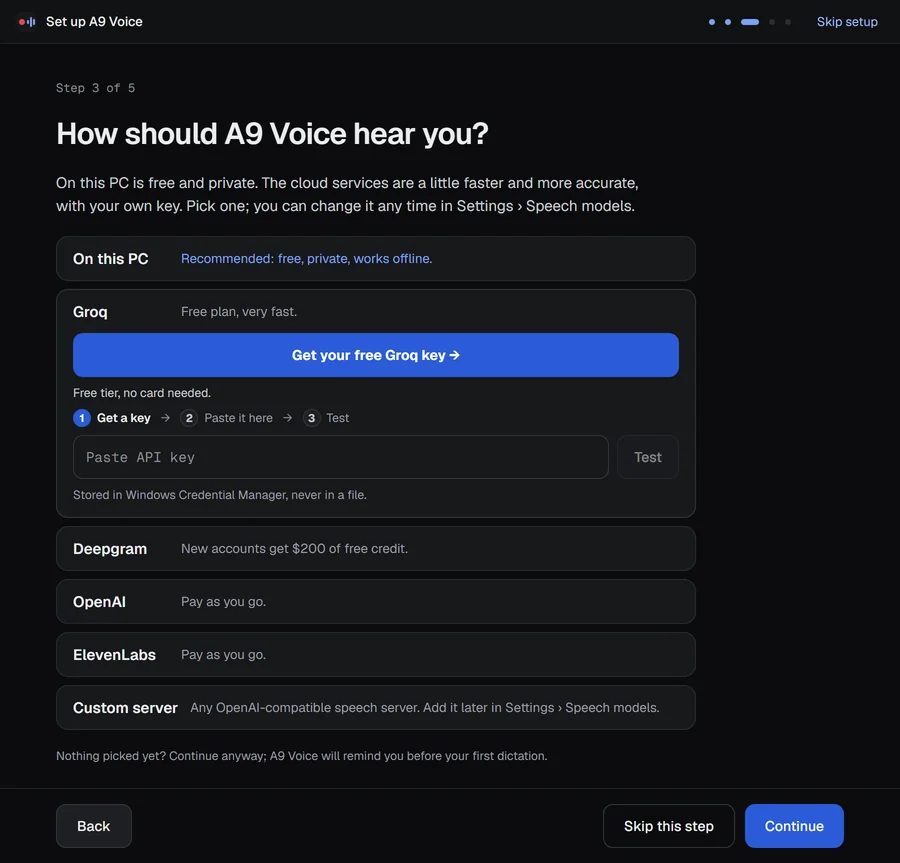
- Click Get your free Groq key →. Your browser opens the service's own key page. Sign in there and create a key. (For Groq, this is console.groq.com/keys.)
- Come back to A9 Voice, click in the Paste API key box and paste the key.
- Click Test. A9 Voice saves the key and tries it. A line says Connected and shows what it heard.
The tile then says Key saved. The key is stored in Windows Credential Manager, never in a file. The first service that has a key becomes the one A9 Voice uses. You can pick nothing and click Continue anyway; A9 Voice reminds you before your first dictation.
If you save a first Deepgram key, a box under its tile asks Also use Deepgram for Meeting notes. It starts checked, and Meeting notes move to Deepgram when you click Continue. Uncheck it to keep Meeting notes on the model they use now.
Step 4: try it#
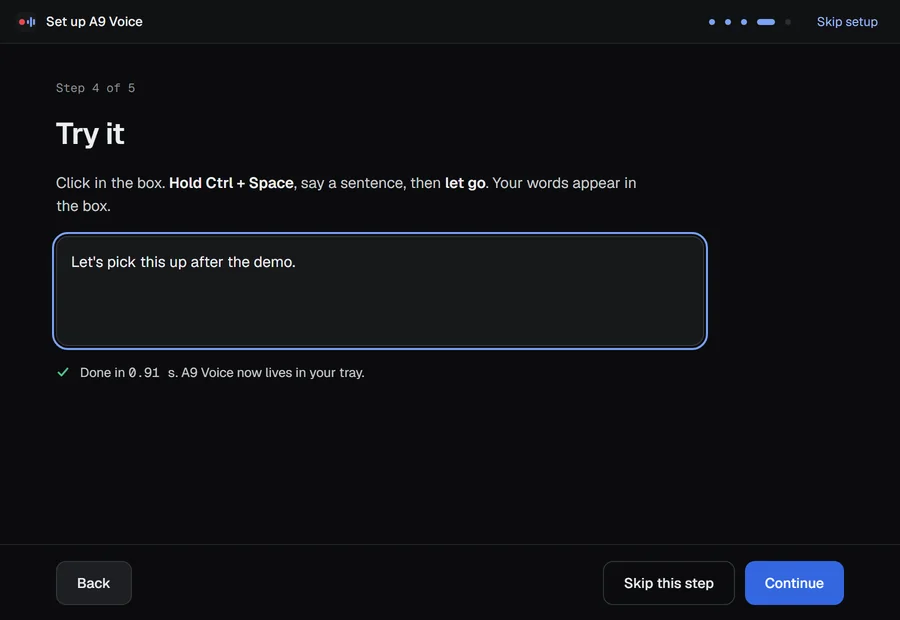
Click in the box. Hold Ctrl+Space, say a sentence, then let go. Your words appear in the box and a line below says how long it took. While you hold the keys it says Listening… let go of the keys to finish. If something goes wrong, a card says That didn't work, explains why, and offers Try again, Pick another provider, Skip and Copy diagnostics.
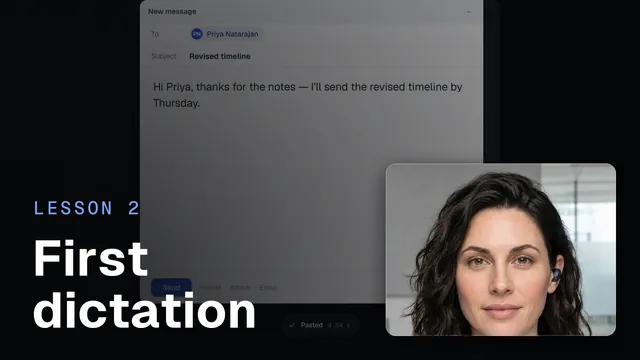 Your first dictationWatch the 47-second video
Step 5: Notes#
The last step tells you that A9 Voice can also record meetings, and shows the record key (Ctrl+Alt+N). If you have no language model yet, it reminds you that summaries need one. This step is optional. Click Finish.
If you want to see setup again, right-click the tray icon and choose Help › Restart setup.
Your first dictation#
You can dictate into any app, anywhere you can type: a document, an email, a chat, a web page.
- Click in a text box.
- Hold Ctrl+Space and talk. A small pill appears at the bottom of the screen with a level meter and a timer. It never takes focus from the app you are in.
- Let go. The pill says Transcribing and then Pasted, and your words appear where your cursor was.
A quick tap of the key does nothing. To cancel while you are talking, press Esc.
Your first dictationWatch the 47-second video
When you finish setup you land on Home, which lists your keys:

Everything about dictation, including hands-free mode, is on the Transcribe page.
Home#
Under your keys, Home counts what you have dictated and recorded. The switch above the four tiles picks the range: 7 days, 30 days or All time. A9 Voice remembers your choice, and a new install starts on All time.
- Words dictated, Dictations and Time saved count your Transcribe dictations. Time saved compares typing at 40 words a minute with the time you spent speaking.
- Notes recorded counts your finished notes and shows their length.
- Under each number, All time shows what the last 7 days added, for example "+1,284 last 7 days". On 7 days and 30 days it compares with the same number of days just before, for example "▲ 18% vs prior 7 days". When those earlier days have nothing in them, it says First week or First month instead of a change.
A range is a rolling count of days: 7 days is today and the 6 days before it.
Your totals keep counting#
Home reads its own small table of daily counts: the day, how many words, how many dictations and how long you spoke. It never holds the text. Settings › General › History kept deletes old dictations from the Transcribe history, but not from these counts, so the totals keep growing. Clear all and Delete in Transcribe leave them alone too.
The count began when you updated to 0.7.8, from the dictations the history still held then. Dictations deleted earlier can't be recovered. The line under the tiles says since when: "Counted on this PC since Oct 6". Nothing leaves your PC.
Settings › General › Reset counts starts the dictation counts again from zero, after asking. Your Transcribe history and your notes are not touched.
Your first meeting note#
A note is a recording of a meeting, a video or a voice memo. A9 Voice records your microphone and the sound your PC plays, so it hears both sides of a call. No bot joins the meeting.
New to it? Watch Sara record a first meeting.
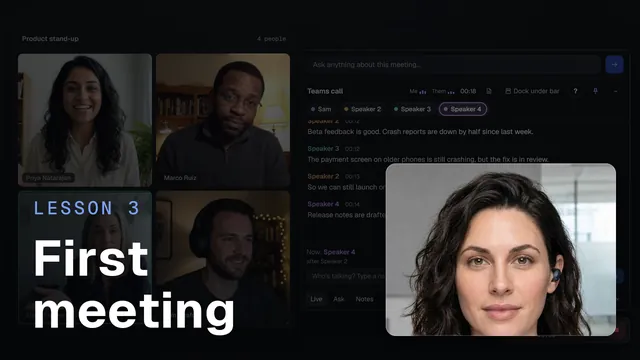 Your first meetingWatch the 1-minute video
1. Check which models it will use#
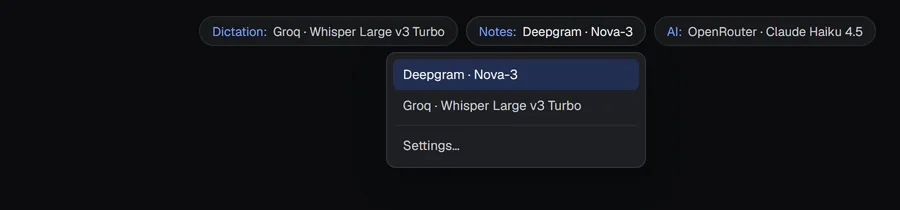
The three chips at the top right show what A9 Voice uses: Dictation (speech to text for dictating), Notes (speech to text for meetings) and AI (the language model that writes summaries and answers questions). Click a chip to switch.
- Notes can use Deepgram, ElevenLabs, a model on this PC, or the other services you have set up. Deepgram, ElevenLabs and models on this PC tell the people on a call apart. The others label lines Me and Them. If you only added a Groq key, open the Notes chip and pick it.
- AI needs a key from a language-model service. Without one, you still get a transcript, but no summary. Add one in Settings › Models (see Language models).
2. Start recording#
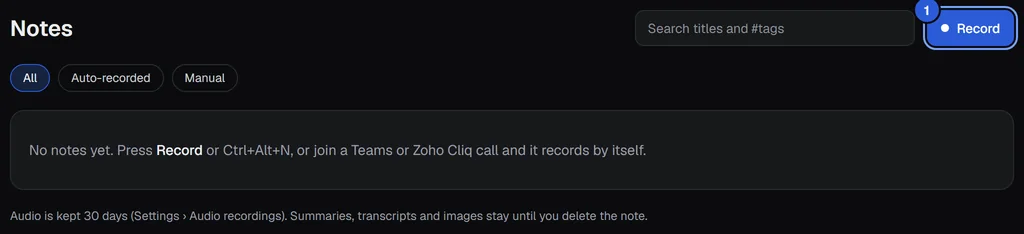
Open Notes and click Record, or press Ctrl+Alt+N from anywhere. The Record button in the left sidebar does the same, and turns into Stop with a timer while you record.
If you join a Microsoft Teams or Zoho Cliq call, A9 Voice starts by itself and shows an 8-second notice with Discard and Keep. You can turn that off, or add other meeting apps, in Settings › Recording.
A small recording bar appears on your screen:
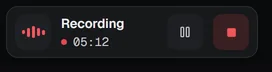
It shows Recording, the time, Pause and Stop. Hover over it for more buttons: Snip (add a screenshot to the note), Live window (watch the transcript as it happens), the microphone and computer-audio pickers, and a button that shrinks it to a small pill. The full story is on Recording a meeting.
3. Stop#

Click the square stop button on the bar. It asks Stop recording?: choose Stop to keep the recording, or Stop & discard… to delete it (it asks once more before it deletes anything). Esc closes the question.
4. Wait for the note#

The note appears at once in Notes. Its row says Transcribing… and then Summarizing…. When the status disappears, the note is ready. If it says Needs a look, open it for the reason and click Try again.
5. Open it#
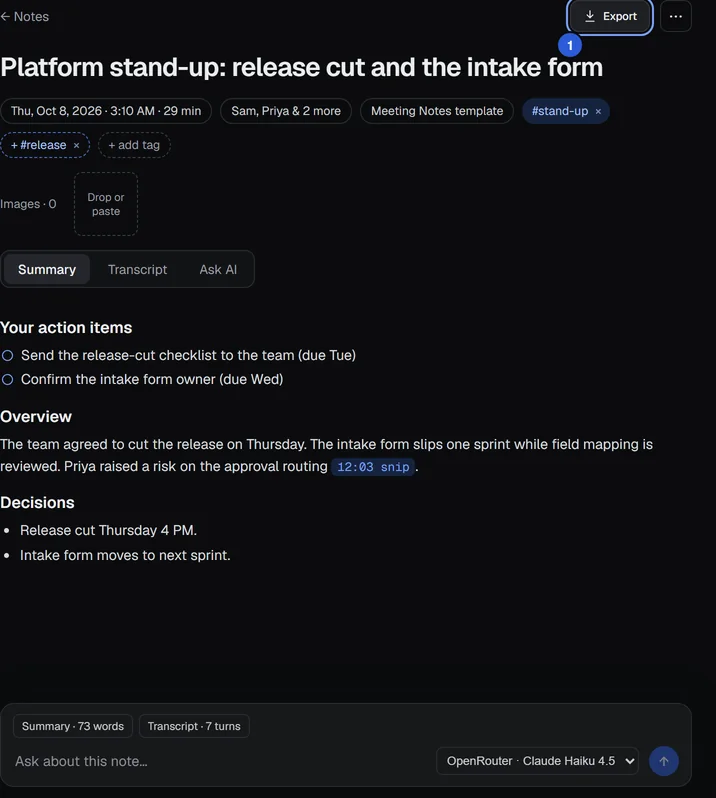
Click the note. The page has three tabs: Summary, Transcript and Ask AI. The right column lists the speakers: type a real name in a box to rename someone everywhere in the note. If the summary is missing because you had no language model, add a key, then click Regenerate summary in the right column. More on this page in The note page.
6. Export#
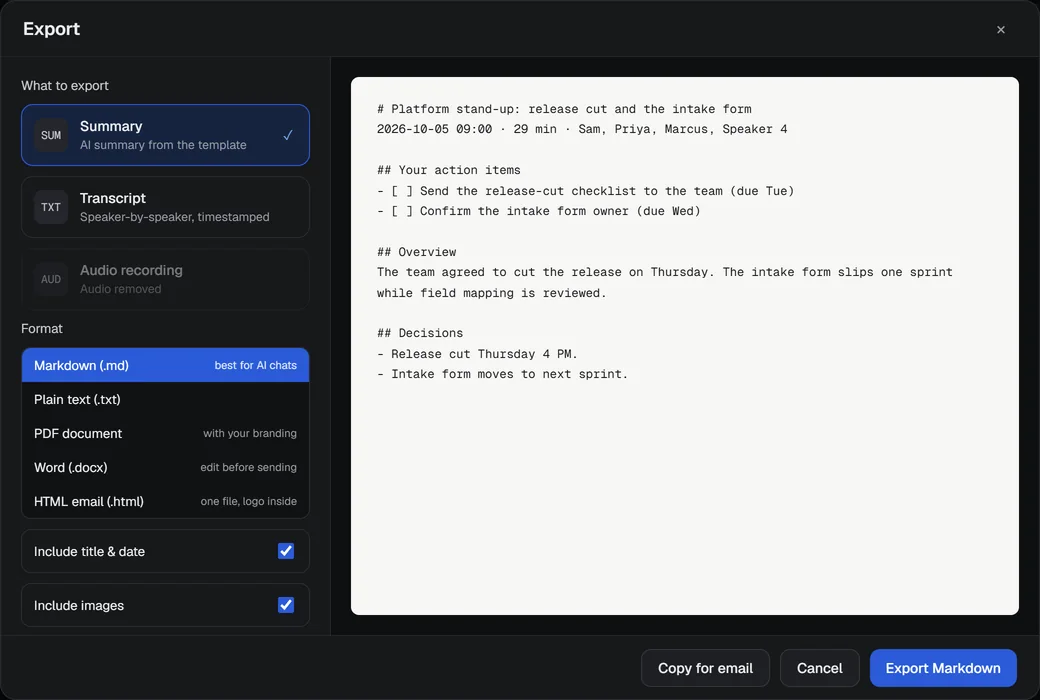
Click Export at the top of the note. Choose what to export (Summary, Transcript or Audio recording), pick a format (for the summary: Markdown, plain text, PDF, Word or an HTML email file), and click the blue button, for example Export Markdown. When it says Saved., click Show in folder. Copy for email puts the summary on the clipboard, ready to paste into a new message.
Every note also lives in its own folder on your PC (by default under Documents\A9 Voice\Notes) with its summary and transcript as plain files. Open it from the ⋯ menu with Show in folder. See Templates and export for all the formats.
If something goes wrong#
- Nothing happens when you hold the key. The sidebar shows Key in use · fix if another app has the same shortcut. Click it, or open Settings › Dictation and choose another key.
- The pill says a key is missing or rejected. Click the pill's Fix link, then check the key in Settings › Models.
- The note failed or has no summary. See the steps above and Troubleshooting.
Where to go next#
The manual is also one click away inside the app: the ? at the top right of every page opens the manual at that screen, and Manual in the sidebar (or Help › Manual in the tray menu) opens its front page.
- Transcribe: hands-free mode, history, Enhance with AI and what to do when text does not paste.
- Dictionary: teach A9 Voice your names and jargon.
- Speech models and Language models: choose and add services.
- Recording a meeting and The note page: everything about notes.
- Keyboard shortcuts: every key in one place.
- Privacy and data: where your audio, text and keys go.
- Updates and channels: how A9 Voice keeps itself current.
Something missing or wrong? Report an issue, or use Copy diagnostics in Settings › General when asking for help.